Hello Tales Wordsmiths! Whether you are brand-spankin’ new or just need a refresher, I hope you find these guides helpful. Everything is interconnected, so if you don’t find what you’re looking for here, check out the other guides coming soon!
This guide is for those that are using the Code Editor option, and for those that include choices or branching in their stories.
The Results Page
Every time a player comes to the end of an episode, the app will take them to the results page, where they are always given the option to continue to the next episode and view any comments made on that story. There are a few more things you can add to your results page to give your reader a more game-like experience.
Paths/Key Decisions
Paths or Key Decisions are another way you can show the player that their choices have consequences or a real impact on the story.
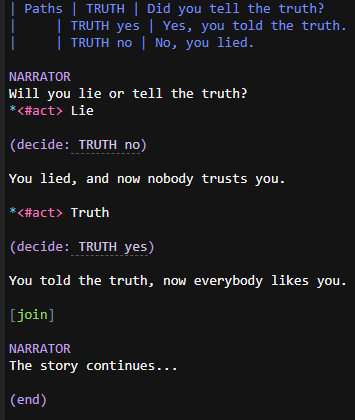
In the example, I have a Path header with the paired decision codes after the choice is made:
  | Paths | TRUTH | Did you tell the truth?
  |     | TRUTH yes | Yes, you told the truth.
  |     | TRUTH no | No, you lied.

  NARRATOR
  Will you lie or tell the truth?
  *<#act> Lie

  (decide: TRUTH no)

  You lied, and now nobody trusts you.

  *<#act> Truth

  (decide: TRUTH yes)

  You told the truth, now everybody likes you.

  [join]

  NARRATOR
  The story continues...

  (end)
(Note: This example uses the [join] method of branching. If you want to learn more about it, keep an eye out for the Branching Methods guide. This example also uses <#act> in the choice lines, which will also be explained in the Branching Methods guide.
For this header type, Paths is first, followed by the path label and the path info:
| Paths | TRUTH | Did you tell the truth?
Directly below are the different paths the player can take. First must be an empty section, then the path code, TRUTH yes and TRUTH no, and the message given to the player if that is the path they chose:
  |     | TRUTH yes | Yes, you told the truth.
  |     | TRUTH no | No, you lied.
With this header type, Paths is the only thing that can’t be customized, and keep in mind that the path code must be formatted as caps, TRUTH, and then lower case, yes or no in this example.
Much like a playstyle, Paths must be paired with a code in the script in order to function correctly:
(decide: TRUTH no)
And
(decide: TRUTH yes)
Usually the decide codes are placed directly after the choice, but you can place them at any point in your script and it’ll work. Just make sure that only one decision code from that particular path can be played through.
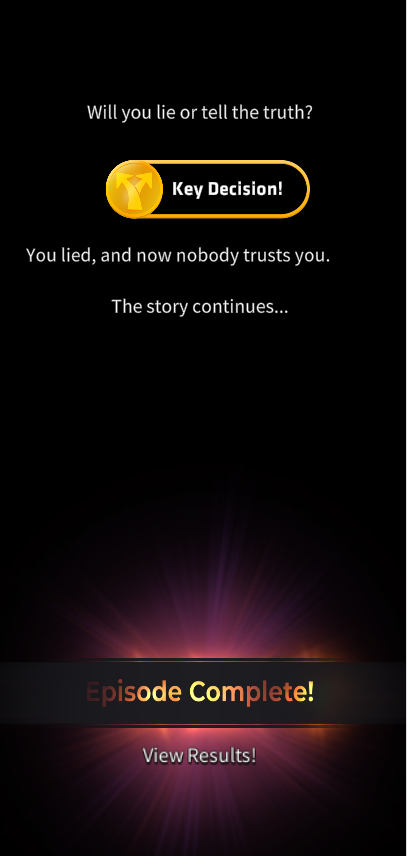
When the script plays through a (decide: ) code, it will give the Key Decision visual effect, making the choice have more impact on the player as they are reading your story.
If, for whatever reason, you don’t want the Key Decision visual effect to play, you can code it like this:
(decide: TRUTH no -hide)
And
(decide: TRUTH yes -hide)
If you choose to hide the visual effect, the Key Decision will still show up on the results page.
(Note: There is a bug in the TC where the paths don’t show up on the results screen.
Hopefully it’ll be fixed soon and I can put a screenshot here. Rest assured your paths will show up on the app. I’ll share screenshots below of an example on the app.)
This is how the results page will look if all you have is one path. You can see the path info and the percentage of players that chose that particular path.
One great feature of Paths is that you can have as many as you want, and they will all show up on the results page.
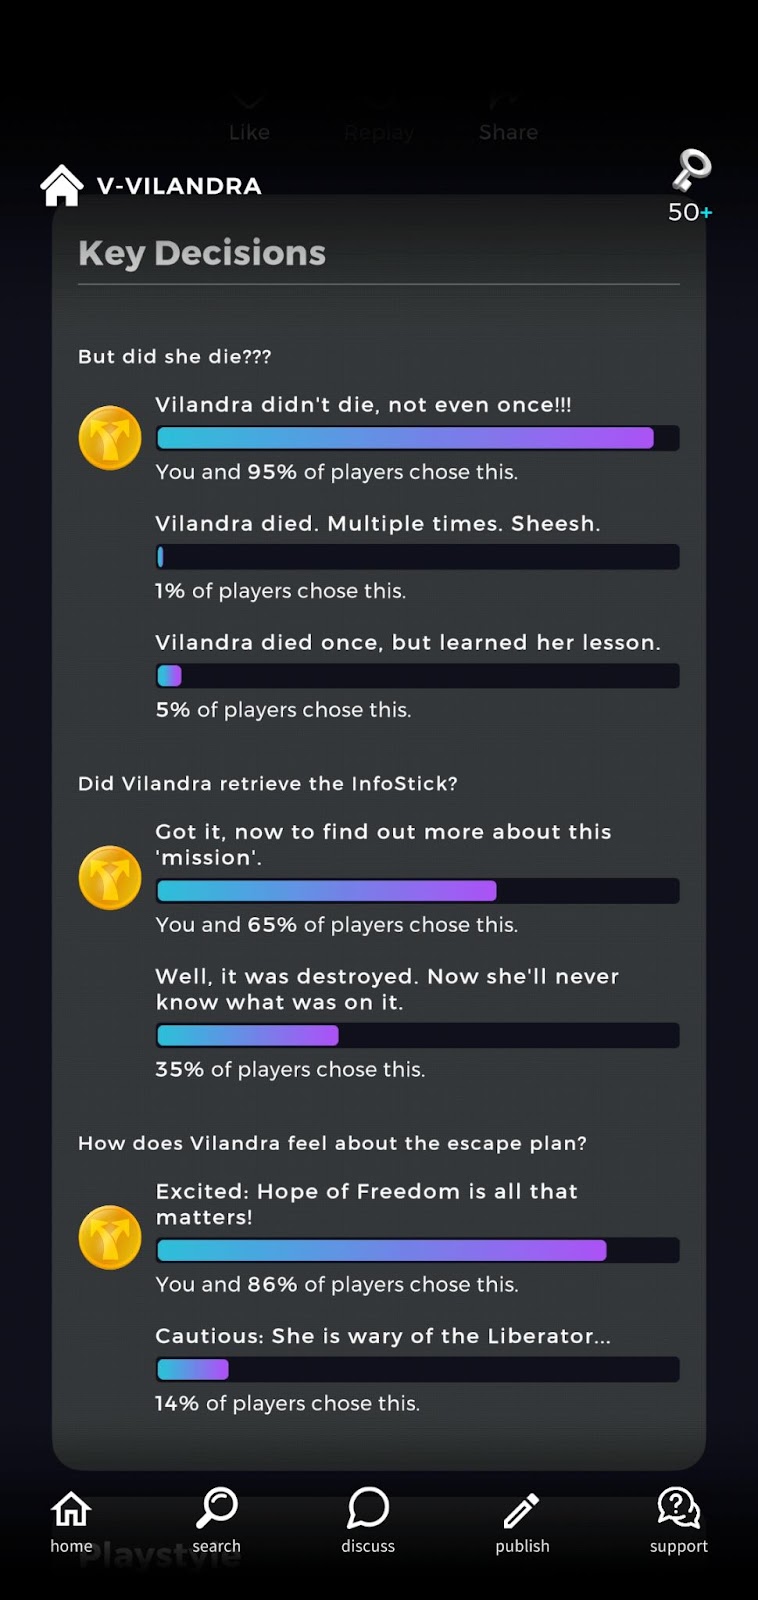
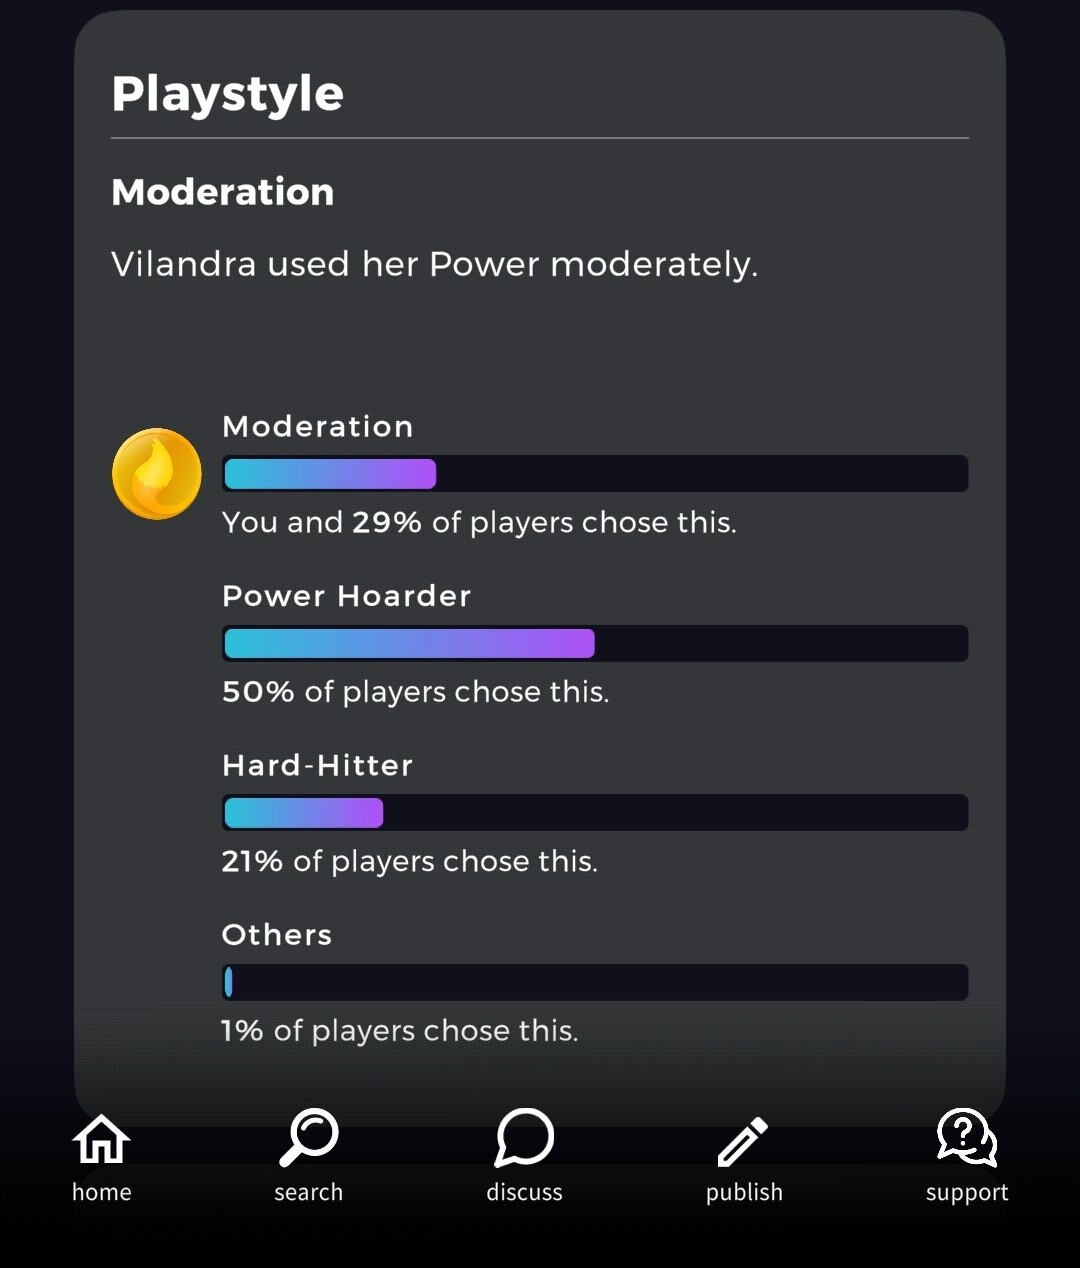
These are examples from episode 4 of my own story V-Vilandra as shown on the app, where I have 3 different Paths that players can go down and 3 possible playstyles. (To learn more about playstyles, see the Playstyles guide)
That’s all for the Paths/Key Decisions guide, if you have any questions or comments, feel free to post below!