Hello Tales Wordsmiths! Whether you are brand-spankin’ new or just need a refresher, I hope you find these guides helpful. Everything is interconnected, so if you don’t find what you’re looking for here, check out the other guides coming soon!
This guide is for those that are using the Code Editor option.
How to add Actors to your Story
There are two options for adding Actors to your story; using ready-made public assets from the Asset Library, or creating your own using the Tales Character Creator tool.
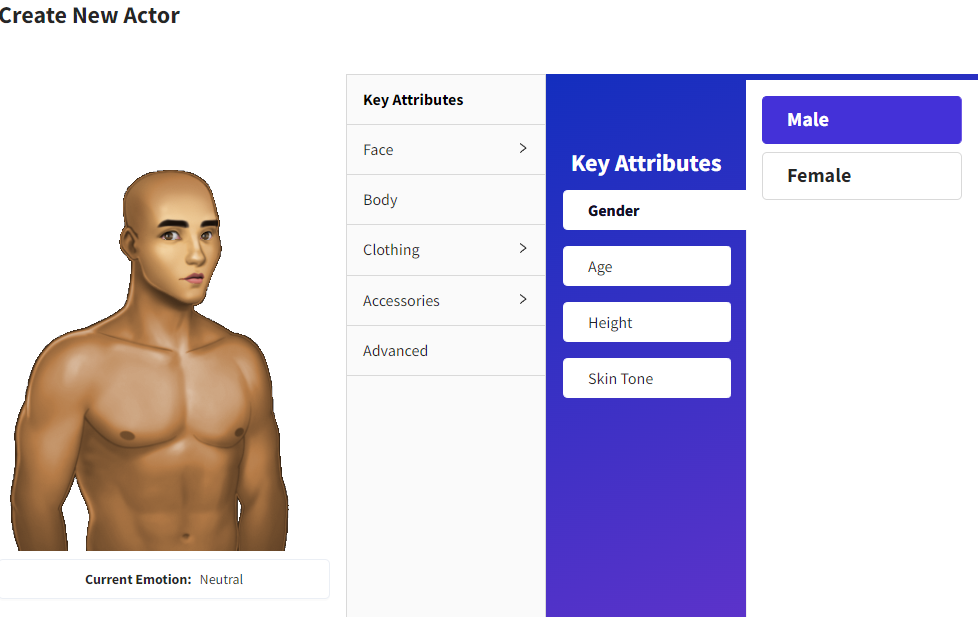
To add an Actor to your asset list, go to the Assets tab, and click Add New under the Actor section. A new screen will pop up.
Public Assets
Public Assets are ready-made actors available for all writers in the Asset Library.
![]()
To select a Public Asset for your story, click on the Search New Actor tab and look for an actor you think would fit the character you want to add to your story.
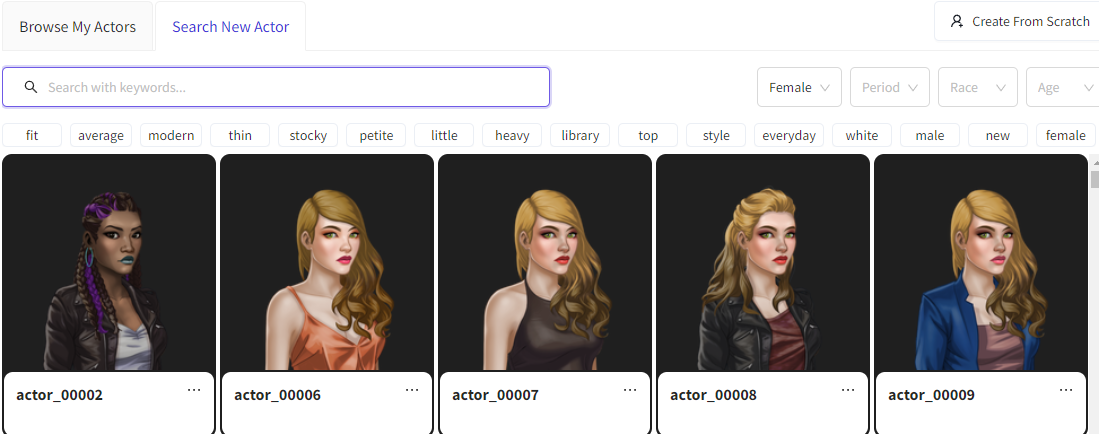
You can narrow down your search by selecting gender, time period, race, age, or searching by keywords. When a public asset is selected, the Character Creator tool is accessed using that actor as a template.
You will then have the option to change any features or clothing, or to just keep that actor as they are. See Saving Actor Assets below for next steps.
Custom Assets
![]()
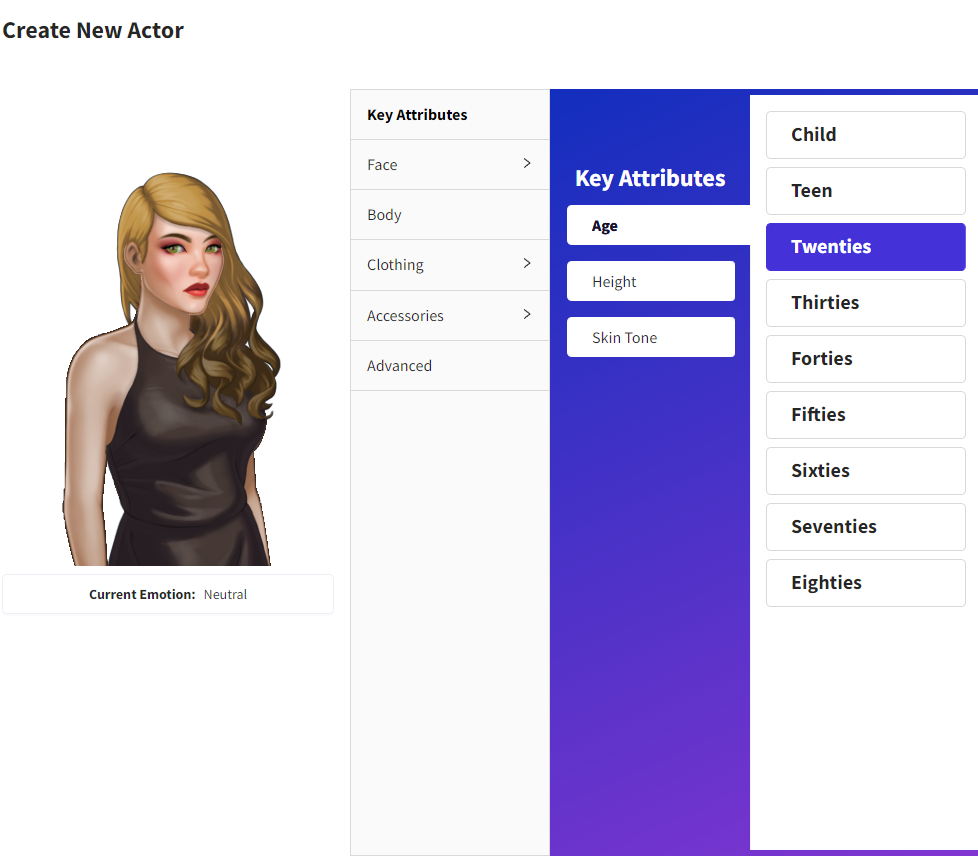
To create your own, custom-made actors, click the Create From Scratch button.
This will access the Character Creator tool, where you can customize any number of characters for your story.
Saving Actor Assets
![]()

![]()
When you have selected or are done creating your actor, click the Save button. This will take you to a new window, where you will need to input the actor name and then click the
Create Actor button. This will export the asset to the system to be processed.
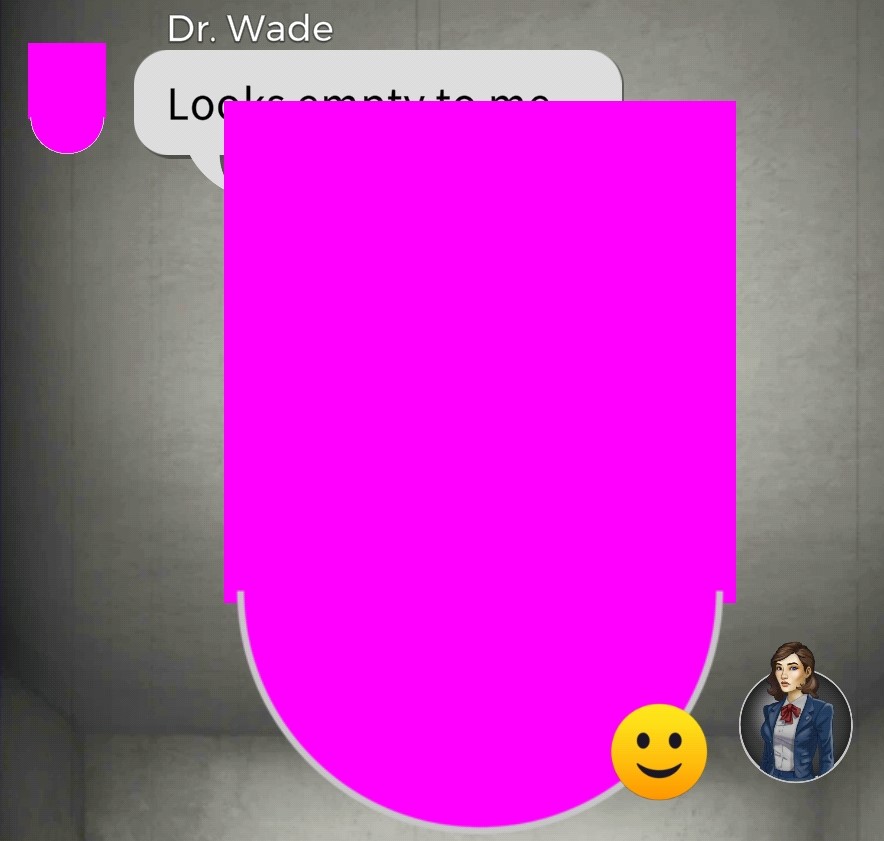
IMPORTANT:
Please note that it can take some time for assets to appear correctly in your script. First they may appear as what we call a pink blob, then emotions will default to neutral until the asset has been fully exported. Exporting times have become faster, but it all depends on how many assets are being created over the entire system.
DO NOT make any changes to exporting assets until they have been fully processed, as this could mess up some of the character emotions.
![]()
If you want to edit an actor’s info, click on the actor asset in the Assets tab.
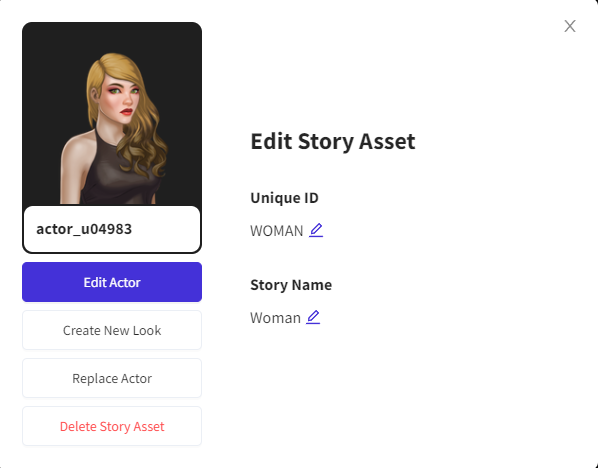
Here you can edit the Unique ID, Story Name, the actor themselves, create a new Look for the actor (which is talked about in the next section), choose a different actor, or delete the actor from your asset list.
Adding Actor Looks
Any actor that you selected from the asset library or created with the Character Creator tool are the Default looks of that actor. If you would like to have different Looks for your actors, with different hair styles, clothing, or accessories, click the Create New Look button on the actor asset page.
Public Assets
If the actor you chose was originally a public asset, there may be some looks that are already available in the Asset Library. Go to the Search New Actor tab, and search around for the actor looks you need. You may need to browse a bit to find them, but once you do, just select the actor, and it will take you to the Character Creator tool, giving you the option to make any changes before saving.
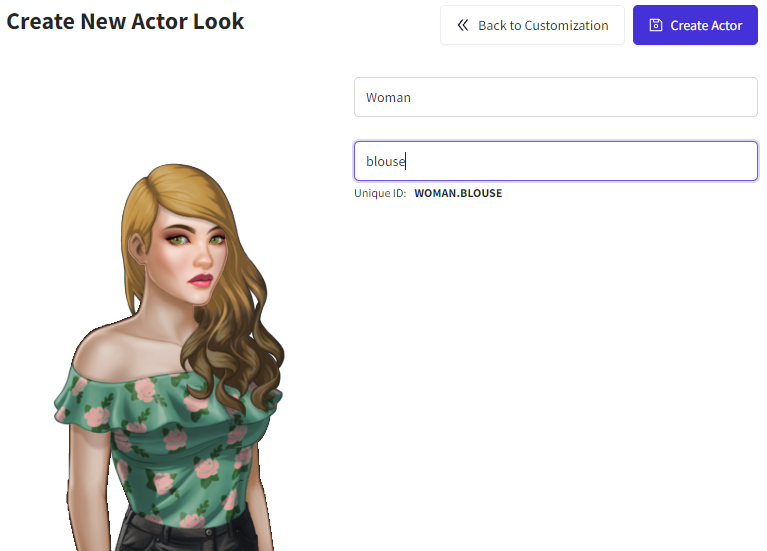
Once you find a Look you’d like to use, input the Look Name
(I like to use terms that are easily associated with the Look, in this case blouse) and click the Create Actor button.
Custom Assets
You can also create Looks for custom assets that you made yourself, or any actor asset that you have in your asset list. Go under the Browse My Actors tab, and you’ll see all of the actors you have in your asset list for that particular story.
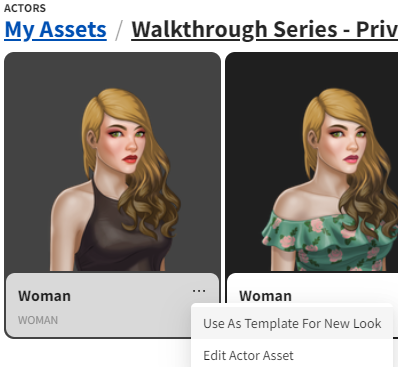
If you have multiple stories with actors, click the My Assets link, and it’ll show every actor you’ve ever made over all of your stories.
Click the three dots (…) next to the actor name, and it will give you the option to use that asset as a template for making a new one. Customize, name the Look, and click the Create Actor button just like before.
IMPORTANT:
When creating a new Look, it is important to not change any facial features of the actor. For example: You don’t want your actor to have a different nose every time they change their clothes. If you do want to change a significant feature like that, you’d have to do it for each Look, including the Default Look, in order for it not to look weird when readers are playing your story.
You can add any number of Looks for any of the actors in your stories!
In the next section, I’ll talk about how to use Looks in your script.
Coding Actors & Changing Looks
Now that you have a few actors and Looks in your asset list, let’s talk about how to implement them in your script.
Scene Directions
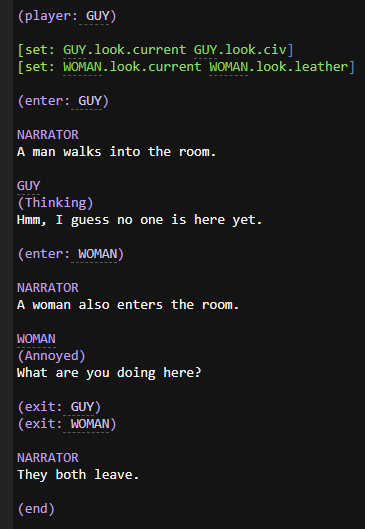
There are three scene directions to use for actors: (enter: ), (exit: ) and (player: ).

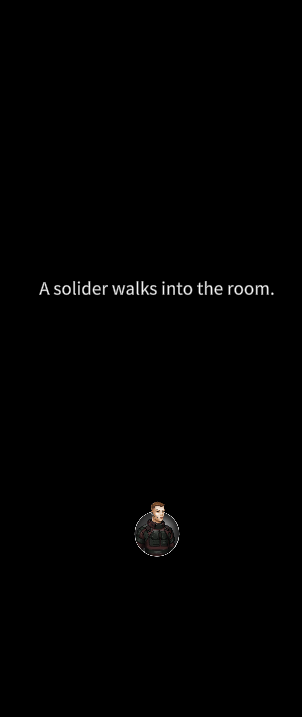

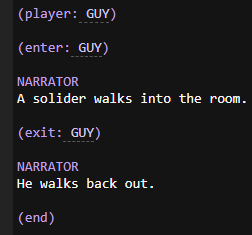
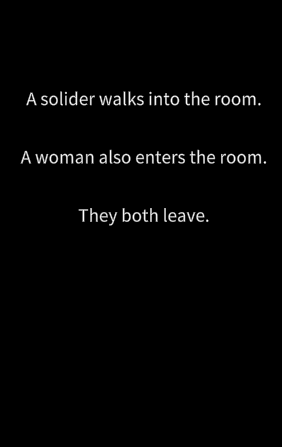
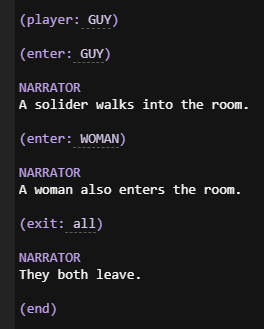
In this example, I have my actor enter the scene:
(enter: GUY)
and then exit:
(exit: GUY)
His character portrait appears at the bottom of the screen, and then disappears. If the character portrait does not appear at the bottom of the screen, you need to switch your story format from Prose to Dialogue.
![]()
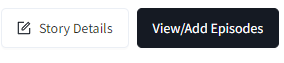
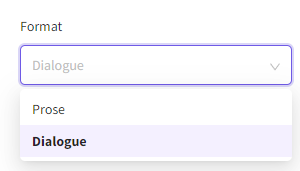
To do this, click on My Stories at the top right of the home page, then the Story Details button. This will take you to the series info page. At the bottom where it says Format, select Dialogue. Now you’re set to include Actors in your story.

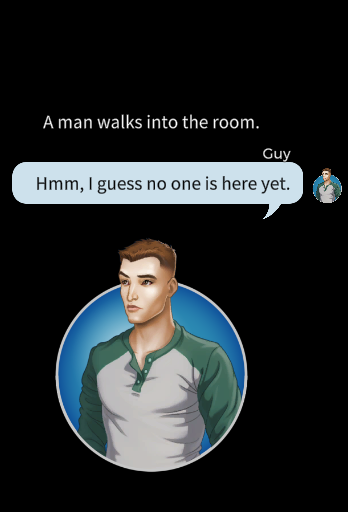
In this example, I added the command:
(player: GUY)
before entering him into the scene. This changes his orientation, from looking to the right to looking to the left. The command (player: ) is mostly used to show the reader which character they are playing as. It makes the actor stand out from the other actors that may be entered into a scene. You can change which actor is the player at any time, just change which actor Unique ID is included in the player command. Only one actor can be set as the player at a time.
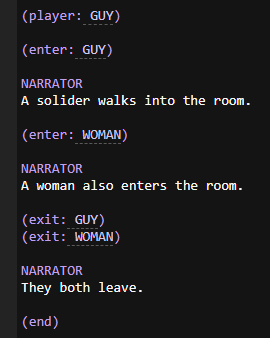
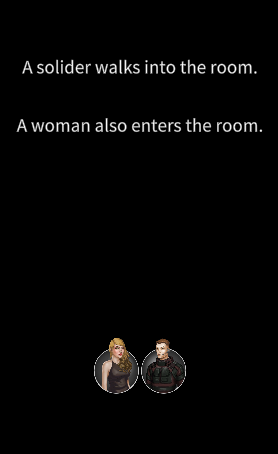
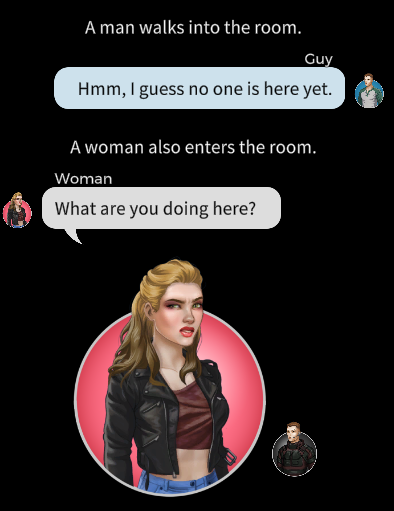
In this example, I have another actor entered into the scene. Since I have GUY set as the player, it looks like they are facing each other, and since I placed both exit commands one after the other, they both exit the scene at the same time.
This last image shows an alternative exit command, (exit: all). As it implies, it exits all actors from the scene. If you only want certain actors to exit, use the individual exit code, or this other alternative:
(exit: GUY, exit: WOMAN)
You can use the same thing for entering multiple actors at the same time:
(enter: GUY, enter: WOMAN)
Dialogue & Actor Emotions
Once you have your actor/s entered into the scene, now you can add some dialogue. Dialogue lines are usually organized like this:
  ACTOR_ID
  (Emotion)
  I am talking now.
First is the Unique ID, or the code used to call up the actor. Next is the emotion you want the actor to express while saying the line. If you don’t put an emotion, it will default to neutral.

There are 25 total emotions to choose from. You can add emotions easily by clicking the Emotion button on the left side of the screen, or by just typing them into your script. Lastly is the line of dialogue you are having the actor say.
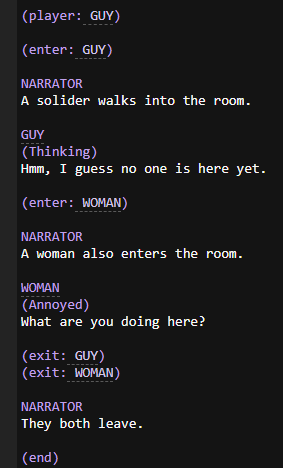
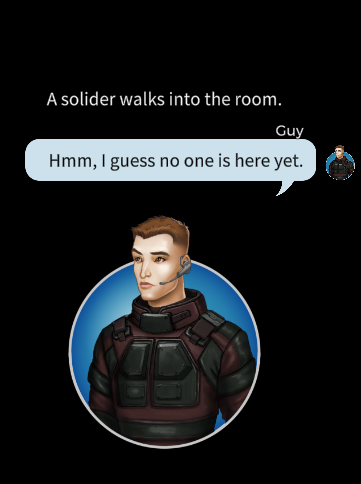
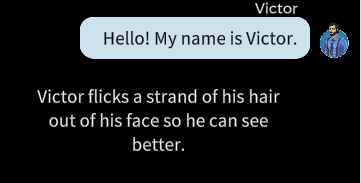
In this example, I have each actor say a line of dialogue. When it is their turn to speak, their character portrait becomes bigger on the screen, and they display the indicated emotion. Their smaller character portrait pops up next to the line of dialogue as well as their Story Name, so the player can keep track of who said what.
Setting Looks
To use a Look for an actor, set the Look you want in the script using this line of code:
[set: ACTOR_ID.look.current ACTOR_ID.look.look_name]
If you do not set the actor’s Look, they will automatically show up as the Default Look.
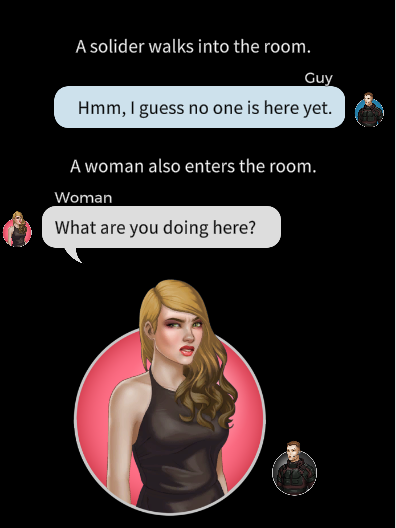
Here I have set the Looks for the two actors before they are entered into the scene.
If you want to change an actor’s Look, just use the same code, and change the Look Name to whichever Look you need. If you want it set back to the Default Look, just put default as the Look Name:
[set: GUY.look.current GUY.look.default]
You can change Looks at any time, even in the middle of a scene. Set Looks will carry over into episodes on the Tales App, but not within the emulator. In other words, if I have Guy’s Look set on civ through the end of the episode, the actor will still have the civ Look when a reader is playing the next episode on the app, but not when I am playtesting in the Tales Creator emulator. I usually set actor Looks at the beginning of each episode anyway, but that won’t work for every situation.
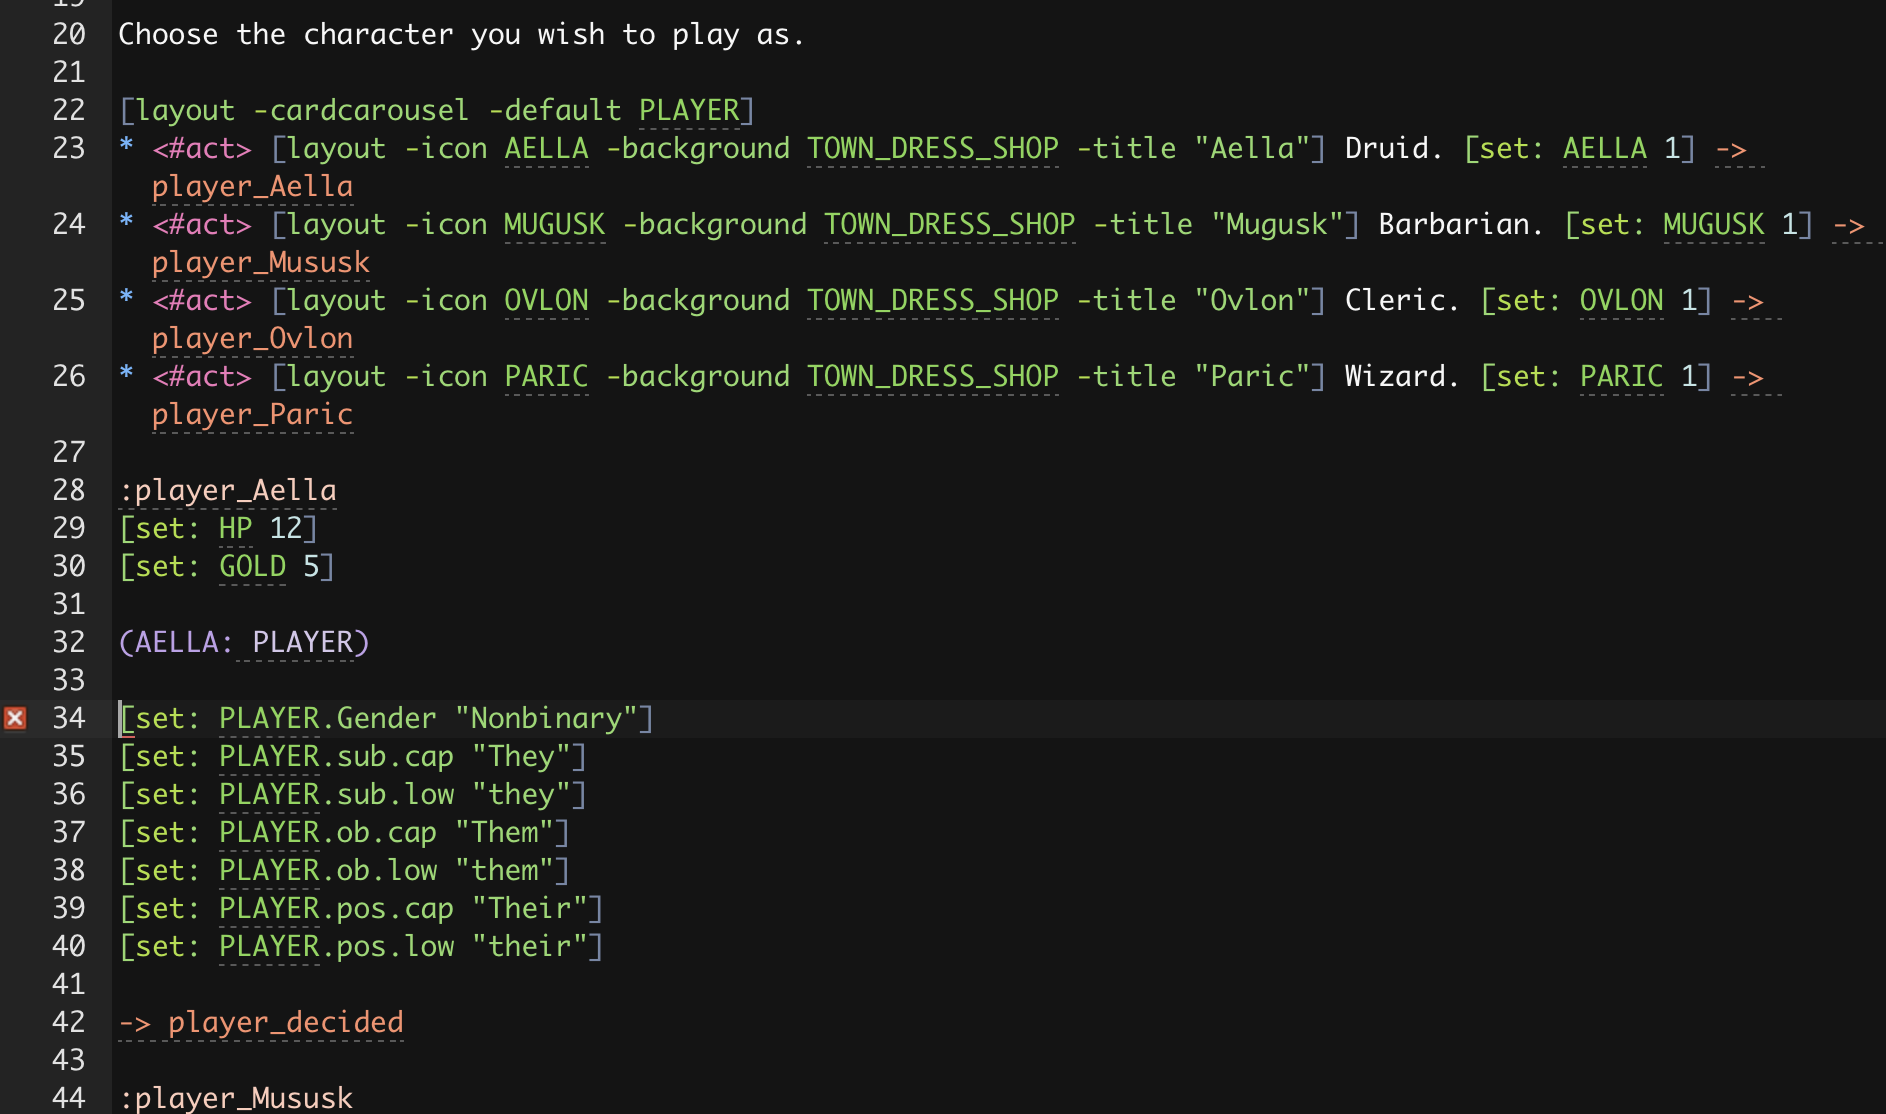
Character Selection Code
Contributed by K M Hasling from her story Moon To Mars - Huge thank you for sharing!
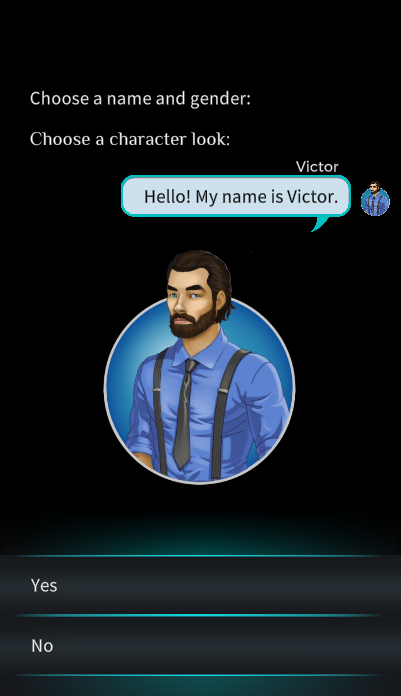
This code uses Substitutions and Looks to allow the player to choose their pronouns and character model. You can also use this code to allow the player to pick these things for other characters in the story.
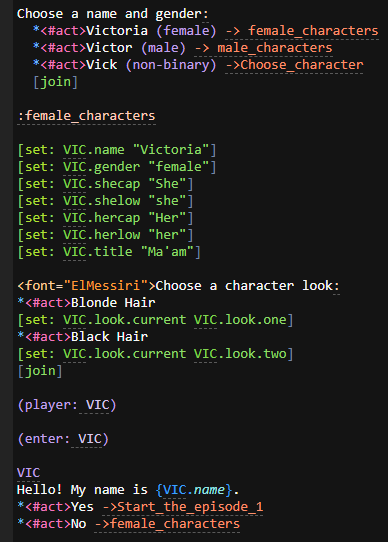
Here is an example of the set codes for the substitutions needed if the player chooses to play as a female character.
  [set: VIC.name "Victoria"]
  [set: VIC.gender "female"]
  [set: VIC.shecap "She"]
  [set: VIC.shelow "she"]
  [set: VIC.hercap "Her"]
  [set: VIC.herlow "her"]
  [set: VIC.title "Ma'am"]
There is the name, gender, pronouns in both upper and lower case, and title. The first part, example VIC.name, is what you will put in the Substitution brackets when scripting. The words in “ ” are what the system will use as the substitution.
Next is the character model selection. In this example I have two options for a female character:
  Choose a character look:
  *<#act>Blonde Hair
  [set: VIC.look.current VIC.look.one]
  *<#act>Black Hair
  [set: VIC.look.current VIC.look.two]
  [join]
Whichever option the player chooses, it sets the Look for the actor.
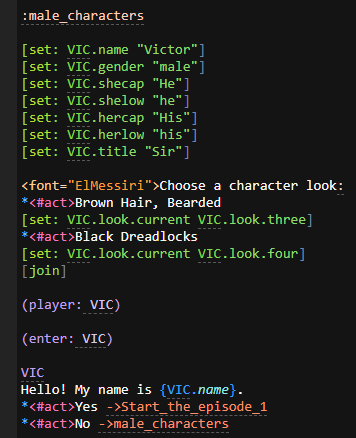
Here are the set codes if the player chooses a male character:
  [set: VIC.name "Victor"]
  [set: VIC.gender "male"]
  [set: VIC.shecap "He"]
  [set: VIC.shelow "he"]
  [set: VIC.hercap "His"]
  [set: VIC.herlow "his"]
  [set: VIC.title "Sir"]
Note that the same bit of code is used for the first part, example VIC.name, but the words in “ ” are different to reflect the different gender. Using the same first part is what will make the Substitution work.
And then different set codes for the male Looks:
  Choose a character look:
  *<#act>Brown Hair, Bearded
  [set: VIC.look.current VIC.look.three]
  *<#act>Black Dreadlocks
  [set: VIC.look.current VIC.look.four]
  [join]
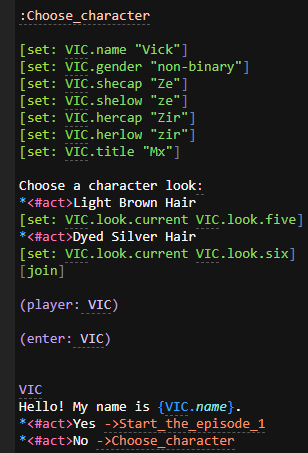
And here is an example of the set codes if the player chooses a non-binary character.
  [set: VIC.name "Vick"]
  [set: VIC.gender "non-binary"]
  [set: VIC.shecap "Ze"]
  [set: VIC.shelow "ze"]
  [set: VIC.hercap "Zir"]
  [set: VIC.herlow "zir"]
  [set: VIC.title "Mx"]
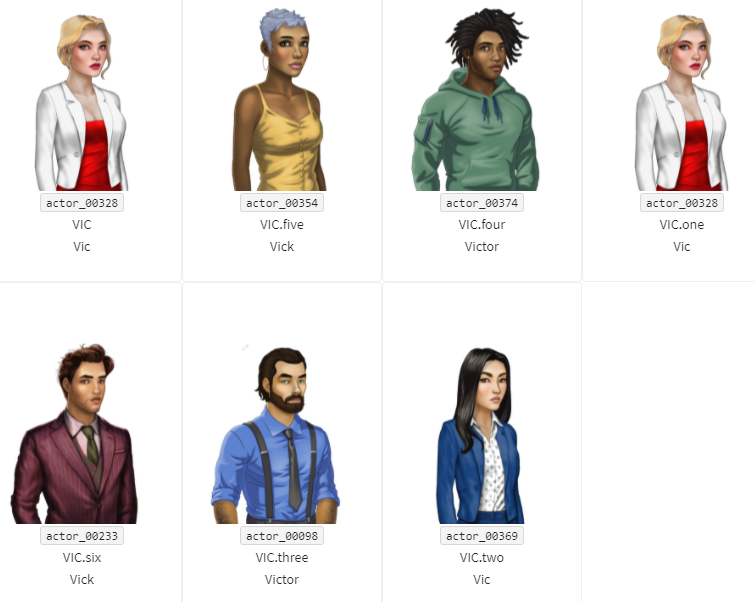
Keep in mind that you need to have all of these Looks available in your asset list.

Lastly, here is an example of how to use the Substitutions in your script.
In this example I chose to play as a male character. As you can see, the Substitution code uses the name and pronouns that were set earlier in the script.
I’ll be honest and say that I personally have never used Substitutions in my stories, but it looks like it can be super useful! There are a lot of different ways you can use it, too. If you would like to learn more about Substitutions, visit the link below:
(P.S. I have been told I went a little overboard on the gender substitutions, but just visit the link above for an explanation on what it’s all about.)
Thanks again to K M Hasling for sharing!
That’s all for the Actor Asset guide, if you have any questions or comments feel free to post below!